Sunday, June 23, 2024

Truck Waterfall

 I have always loved water as far back as I can remember. Maybe it was being born in California and spending a large chunk of my childhood on the Oregon coast or maybe it just as simple of the calming sound is makes when in movement. Whatever it is I am at peace when near so it should come to no surprise that when given in opportunity to turn my love of water and vintage junk and Ed's love of old trucks into a beautiful feature in my yard I jumped on it. 


A lot of our free time is spent looking for truck parts. This means we are traveling to new places or exploring junk yards any chance we can. During one of Ed's junk yard adventures he came across this really neat 1952 Ford pickup cab. The truck cab was rusty and crusty, missing some things including a hood but had some neat bullet holes. The coolest thing about the cab was that the door had been painted with some ones name on it. Right away when he sent me the pictures I knew we had to have it and turn it into something amazing. 


Back in 2018 we were really just starting exterior home renovations that would require the use of heavy equipment aka a backhoe. During our travels across Michigan's Upper Peninsula we had come across this neat yard feature. It was of this old truck cab in far worse shape then ours that had water coming out of hood and going into a pond. From the moment I saw it I knew that was what we needed to do with our truck cab. We heading up to the junk yard first opportunity we could and picked up the cab, and I also found a really neat patina hood (wrong year but really cool) and brought it on home. We spent the rest of that summer looking for the missing cab lights, mirrors, headlight rings etc. Finally; we dug out the hole and positioned the truck. Ed wired the cab and headlights to come on at dusk. Without doing anything else it was already pretty darn amazing. We continued digging out the waterfall stream... that's right we decided a pond less waterfall was just what our space needed. Laid the liner, filled the reservoir and started to dream up how it would be landscaped and the joy it would bring us and others passing by. 


By summer of 2019 it was time to start laying out landscaping and trying to navigate waterfall upkeep, leaves and animals... of things that we had not thought of before. 


Just like any project over the years since it has evolved, changed, challenged us and it has brought us and the people around us joy. It will continue I am sure... 


Thursday, March 28, 2024

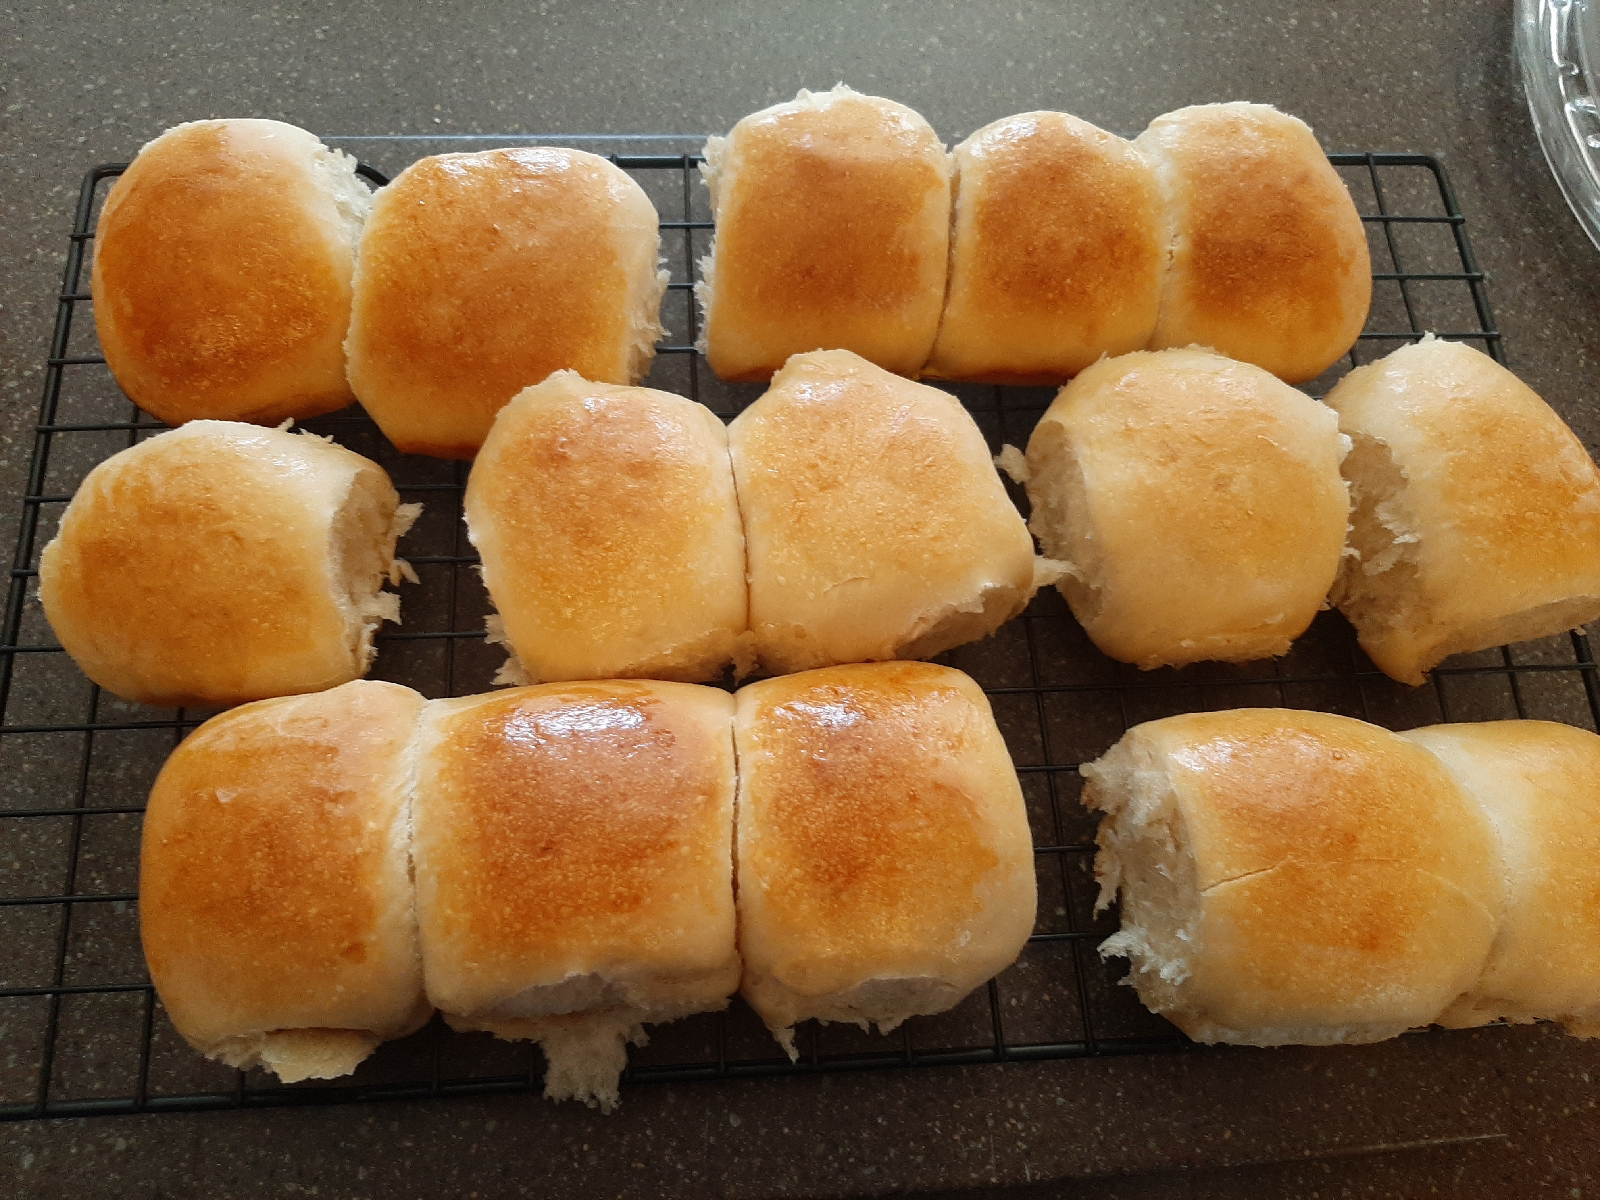
Sourdough Hawaiian Rolls


Sourdough Hawaiian Rolls

Ingredients

  • 1 cup pineapple juice
  • ½ cup milk
  • ½ cup sugar
  • ½ cup starter (super bubbly)
  • ¼ cup unsalted butter softened
  • 1 teaspoon vanilla
  • 1 large egg
  • 2 teaspoons salt
  • 5 cups all Purpose Flour

Egg wash

  • 1 large egg yolk
  • 2 tablespoons water

Instructions

  • With stand mixer using dough hook mix all ingredients less egg wash. 
  • Mix for about 10-15 mins or until smooth and elastic. 
  • Place dough in a greased bowl and cover with plastic wrap or a tight lid.
  • Allow to rise 8-12 hours.
  • Divide dough into 18 even rolls and place in a greased 9×13 baking dish.
  • Cover with towel and allow rise about 1-3 hours or until about double. 
  • After doubled brush with egg wash.
  • Bake for 20-25 minutes at 375 until the rolls are golden in color.
  • Cool.

Thursday, June 1, 2023

June 30 Day Self-Care Challenge

June 30 Day Self-Care Challenge

For the June 30 Challenge I have decided to challenge myself into really focusing on self-care. I want to be purposeful and mindful of taking care of myself and in turn I hope to see results in other areas of my self and life. 

In no particular order here is the list I have come up with: 

  1. Write out three things you love about yourself. 
  2. Do one thing that makes you scared. 
  3. List your favorite part of your body. 
  4. Workout for 30 mins. 
  5. Go on a walk outdoors without your phone. 
  6. Ask three friends to tell you their favorite thing about you. 
  7. Do something that makes you feel special.
  8. Get dressed up.. even if you have no where to go. 
  9. Write out one quality that makes you unique. 
  10. Eat mindfully all day. 
  11. Complete this sentence: I feel happy when... 
  12. Write out three fears and how you can overcome each. 
  13. Listen to an inspiring podcast. 
  14. Have a day free of social media. 
  15. Declutter your workspace. 
  16. Do something intentional with MiKayla only. 
  17. Do something intentional with Nicole only. 
  18. Do something intentional with Jasmine only. 
  19. Do something intentional with Ed only. 
  20. Practice your favorite hobby. 
  21. Facetime someone special in your life. 
  22. Create a new morning routine. 
  23. Adopt a new good habit. 
  24. Set a new short-term goal.
  25. Go to bed distraction free. 
  26. Compliment yourself while looking in the mirror. 
  27. Start or pick back up journaling. 
  28. Define what gives you stress. 
  29. Write down one good thing about the day. 
  30. Create a self care kit and share it; explaining why for items.
Alright that is a pretty good list. Some items are easy, others are stressful to think about, and some are inspiring and I wanna do them right now. Looking forward to a good 30 day challenge. 

Monday, March 20, 2023

Venison Roast Crockpot

Venison Roast

  • Ingredients

  • 3 Pounds venison roast
  • 1 large onion, sliced
  • 1 tablespoon soy sauce
  • 1 tablespoon Worcestershire sauce
  • 1 tablespoon garlic salt
  • ¼ teaspoon ground black pepper
  • 1 (1 ounce) package dry onion soup mix
  • 1 (10.75 ounce) can condensed cream of mushroom soup

  • Directions

  • Clean venison roast and place in a slow cooker. Cover with onion slices, then sprinkle with soy sauce, Worcestershire sauce, garlic salt, and pepper.

  • Stir onion soup mix and condensed soup together in a small bowl. Pour mixture over venison.

  • Cover and cook on Low setting for 6 hours.

Wednesday, March 1, 2023

Friday, February 10, 2023

Healthier Garlic Butter Steak & Noodles

Healthier Garlic Butter Steak & Noodles 

Ingredients: 
1 1/4 lbs (450g) sirloin steak cut into small cubes
4 medium zucchini, spiralized
1 tablespoon olive oil
3 tablespoons butter, divided
2 teaspoons minced garlic
1/4 cup (60ml) beef or vegetable broth
1 tablespoon minced parsley
1 teaspoon fresh thyme leaves
Juice of 1/2 lemon
1/4 cup soy sauce (or coconut amino for paleo)
1 tablespoon olive oil
1 tablespoon hot sauce (we used Sriracha)
Fresh cracked black pepper, to taste
Juice of 1/2 lemon

Instructions:
1. In a mixing bowl, combine the ingredients for the marinade (soy sauce, olive oil, hot sauce, pepper, and lemon juice) and add the steak bites. Mix well and marinate for 15 to 20 minutes minimum, while preparing the other ingredients.
2. Heat the olive oil in a large skillet over high heat. Drain steak from the marinade. Keep the remaining marinade for later.
3. Place the steak in the skillet in a single layer. Do not overcrowd the skillet or meat will steam, so you may have to work in batches depending on the size of your skillet. Cook for 3-4 minutes, stirring occasionally until steak cubes are golden brown. Repeat with remaining meat if needed.
4. Add 2 tablespoons butter and garlic to the skillet; cook for 1-2 minutes, stirring to coat the meat in the sauce. Remove to a shallow plate and set aside.
5. In the same skillet, add butter, lemon juice, red pepper flakes, beef broth, and remaining marinade juices. Bring to a simmer and allow to reduce for 2-3 minutes, stirring regularly.
6. Add the zucchini noodles and toss for two to three minutes to cook it up. Stir in the fresh parsley and thyme, then allow the cooking juices to reduce for one minute if the zucchini renders too much water. Push the zucchini noodles on the side, add the steak bites back to the pan and reheat for another minute.

Yields 3 Servings 

Thursday, February 9, 2023

Cheeseburger Soup

Ingredients:
  • 1 lbs lean ground beef
  • 1/4 cup chopped onion
  • 3/4 diced celery
  • 1 14.5oz can diced tomatoes
  • 3 cups low sodium chicken broth
  • 2 tps worcestershire sauce
  • 1 tsp dried parsley
  • 1/4 tsp salt
  • 1/4 tsp pepper
  • 7 cups baby spinach
  • 4 oz reduced fat shredded cheddar cheese
Instructions
  1. Brown ground beef. Added the onion and celery; saute until tender. Remove from heat and drain any liquids. 
  2. Added in tomatoes, broth, worcestershire sauce, parsley, salt and pepper. Cover and simmer on low for about 20 mins. 
  3. Add in the spinach and cook until wilted which is about 1 to 3 mins. 
  4. Top each serving with one ounce of the shredded cheese. 
This recipe makes 4 servings and takes about 35 minutes to cook and 10 mins to prep. 

Tuesday, June 7, 2022

Detox Water

Detox Water:

Just follow these simple steps:

·         Slice: Wash the fruits and herbs, then, slice.

·         Assemble: In a big enough container, put alternate layers of ice and the sliced add-ins.

·         Steep: Then, add the water and allow the flavors to infuse for 45 minutes. Then, drink as usual!

Here are a few combinations that you can try for an enjoyable experience:

·         Citrus: orange, lime, lemon, grapefruit, fresh ginger, mint leaves

·         Citrus Berry: orange, lime, lemon, blueberry, strawberry, fresh ginger, mint leaves

·         Cucumber Rosemary: lime, lemon, English cucumber, rosemary, mint leaves

·         Tropical: lime, orange, English cucumber, pineapple, kiwi, mint leaves


Monday, May 30, 2022

Wet Burrito Recipe

Ingredients
  • 1 lb ground beef
  • 1/2 cup chopped onion
  • 2 tsp minced garlic
  • 1 tsp cumin
  • 1/2 tsp salt
  • 1/2 tsp pepper
  • 4.5 oz diced green chile peppers
  • 16 oz refried beans
  • 8 oz tomato sauce
  • 10 oz enchilada sauce
  • 15 oz chili no-beans (Hormel)
  • 6 flour burrito tortillas (about 12 inches)
  • 2 cups shredded lettuce
  • 3 cups shredded Mexican blend cheese
  • Chopped green onions (for garnish)
  • Any additional desired toppings

Instructions

  1. Preheat the oven to 400 degrees F.
  2. Brown the ground beef and onion in a skillet over medium high heat. Cook and stir until evenly browned and onion begins to soften. 
  3. Drain grease, and season with the garlic, cumin, salt and pepper. Stir in the green chilies and refried beans until well blended. Turn off heat, but keep warm.
  4. In a saucepan, combine the tomato sauce, no-bean chili, and enchilada sauce. Whisk together until mixed well, and cook over medium heat until heated through. Turn off heat and keep warm. 
  5. Divide the beef and bean mixture into 6 portions in the pan.
  6. Place a burrito sized tortilla on a plate and place 1/6 of the ground beef mixture onto the center.
  7. Top with a little cheese and lettuce. Leave the lettuce out if you don't want it baked inside. You can substitute or add other veggies as well.
  8. Fold in the left and right side of the tortilla over the filling, holding in place with your fingers. Then fold in the top and bottom sides of the tortilla over the filling (like an envelope) making sure to overlap well so no filling can escape.
  9. Repeat with the other 5 tortillas.
  10. Place seam side down in two greased 9 x 13 oven safe dishes. 
  11. Pour the entire saucepan of the sauce over the top of the burritos.
  12. Top with the remaining cheese sprinkled over all evenly.
  13. Bake in the preheated oven for 15-20 minutes until burritos are heated through and cheese is melted.
  14. Top with more lettuce, tomato, sour cream and dried chives, or your choice of toppings.

Tuesday, January 11, 2022

Weigh-In Tuesday

Week 1 complete. That's right, I survived week 1. Last week my beautiful daughter MiKayla and I hired a personal trainer and nutritionist. I logged 5 out of 7 days but of those days I stayed within my calories. After week of watching what I ate.. the results are in and... 

Tuesday, December 28, 2021

Family Room - Sliding Barn Doors

It is happening.... We are finally back to working on the family room. This past week the weather here in Northern Michigan was calm which gave Ed some downtime and in turn time to work on basement family room remodel. When we last updated you we had finished up the back wall unit.

Here is a link to phase 1.

The fireplace has been wonderful and really helps to make the space feel warm and inviting but the space was far from finished and we knew we wanted to complete the space and really give our family staying here from out of town a private space to sleep at night. We already have a guest room so this space is more of an over flow space so it will act primarily as a family room but since we are over flowing with children and adult children and now grand children, I anticipate this space getting plenty of overnight guest as well. 

Our current phase of this project is to build a wall enclosing the space off from the rest of the basement. We also wanted to add insulation to the ceiling and new wall for some much needed sound proofing. Of course the major transformation part of this phase of the project is the addition of sliding barn doors. 


The wall wasn't as bad as I thought it would be to build. Ed is so handy and really knows what he is doing so it took all of one day to build. We sat in the space for awhile after the wall went up and really thought through what all we wanted to have in this space. First thing that came to mind was adding some more outlets.  The basement has always lacked in outlets so this was the perfect time to wire some up. I wanted to make sure that we allowed our guest ease of charging phone so we used the same outlets that we used in some other spaces in our home.  

Why not wire up some additional lighting while you are at it. We decided that rather than manually turn on each of the custom wall unit lights one by one.. why not put them all on a switch?! But, I didn't want the wall unit to come on with the overhead lights so why not put them on separate switches? so that is what we did. We wired up some recess canless lights in the ceiling on one dimmer switch and put the whole back wall unit on another. Genius!! 


Now it was time to insulate the ceiling and walls and put up the barn door slider unit. wait.... we can't insult the whole ceiling as we found a couple small projects before we can finish it up.. but that is a story for another day... 

Here is the current view from inside the room. 

View outside room with doors closed. 

View outside with doors open. 


We bought a couple items used to build the barn doors. After looking at all the options we decided to by premade doors. Lowes carries 36-84 Zpine Barn Door kits. Each kit was on sale for $89.50, bought 2. The kit came with door, track and hardware. The only thing I don't like about the doors is that they are Z shape and I want X so we bought (4) 3/8-4-36 pine boards for $3.40 each and will make our own X. Stay tune for door update in my next update. Total door cost less stain which we have on hand is $192.60. Of course this does not include the cost to building the wall but for most the wall is already in place. 
We are now able to provide our guest a place to sleep in private.

Stuffed Riceless Peppers

Because we live in northern Michigan and venison is so popular I have made up several recipes using it. My family loves venison. I am sure y...